Wednesday, July 19, 2017

Let there be light.....

Let's be clear here.  Lugging heavy lighting gear around, is NOT a de-light-ful experience.
So finding a 'lite' kit is really something that can brighten any filmmaker's day.
And lately, there have been a flood of interesting products hitting the market.
Looking through all this new kit can be an en-light-ening experience.
Seriously, one of the new popular types of lights, is the 'LED matte' type.
The lights can literally be rolled up and stuffed into a cargo pants pocket.
Not saying I'd recommend doing that, but you could!  The combination of
cool lights (no worries about wearing gloves or needing fans to keep the talent
from sweating with these) plus small footprint, has made these types of lights
a 'bright spot' for many filmmakers on the go.

One such light is LEDGo's Versa Tile.  I needed a light to take with me when
I travel for corporate shoots.  Most of the time, these shoots involve interviews/
talking heads.  But for me, living in Alaska, they can also involve travel on small
planes, to remote locations.  So having gear with a 'small footprint' is important for
a solo filmmaker.

I recently landed a contract to produce a series of eight :30 spots, each highlighting a
different person in the state university's PITAAS program.  This would require some travel
to fairly remote locations, in small planes.  With this in mind, I decided to 'lighten' my
wallet, and buy the LEDGo.  I bought the single panel....which I figured would be enough 
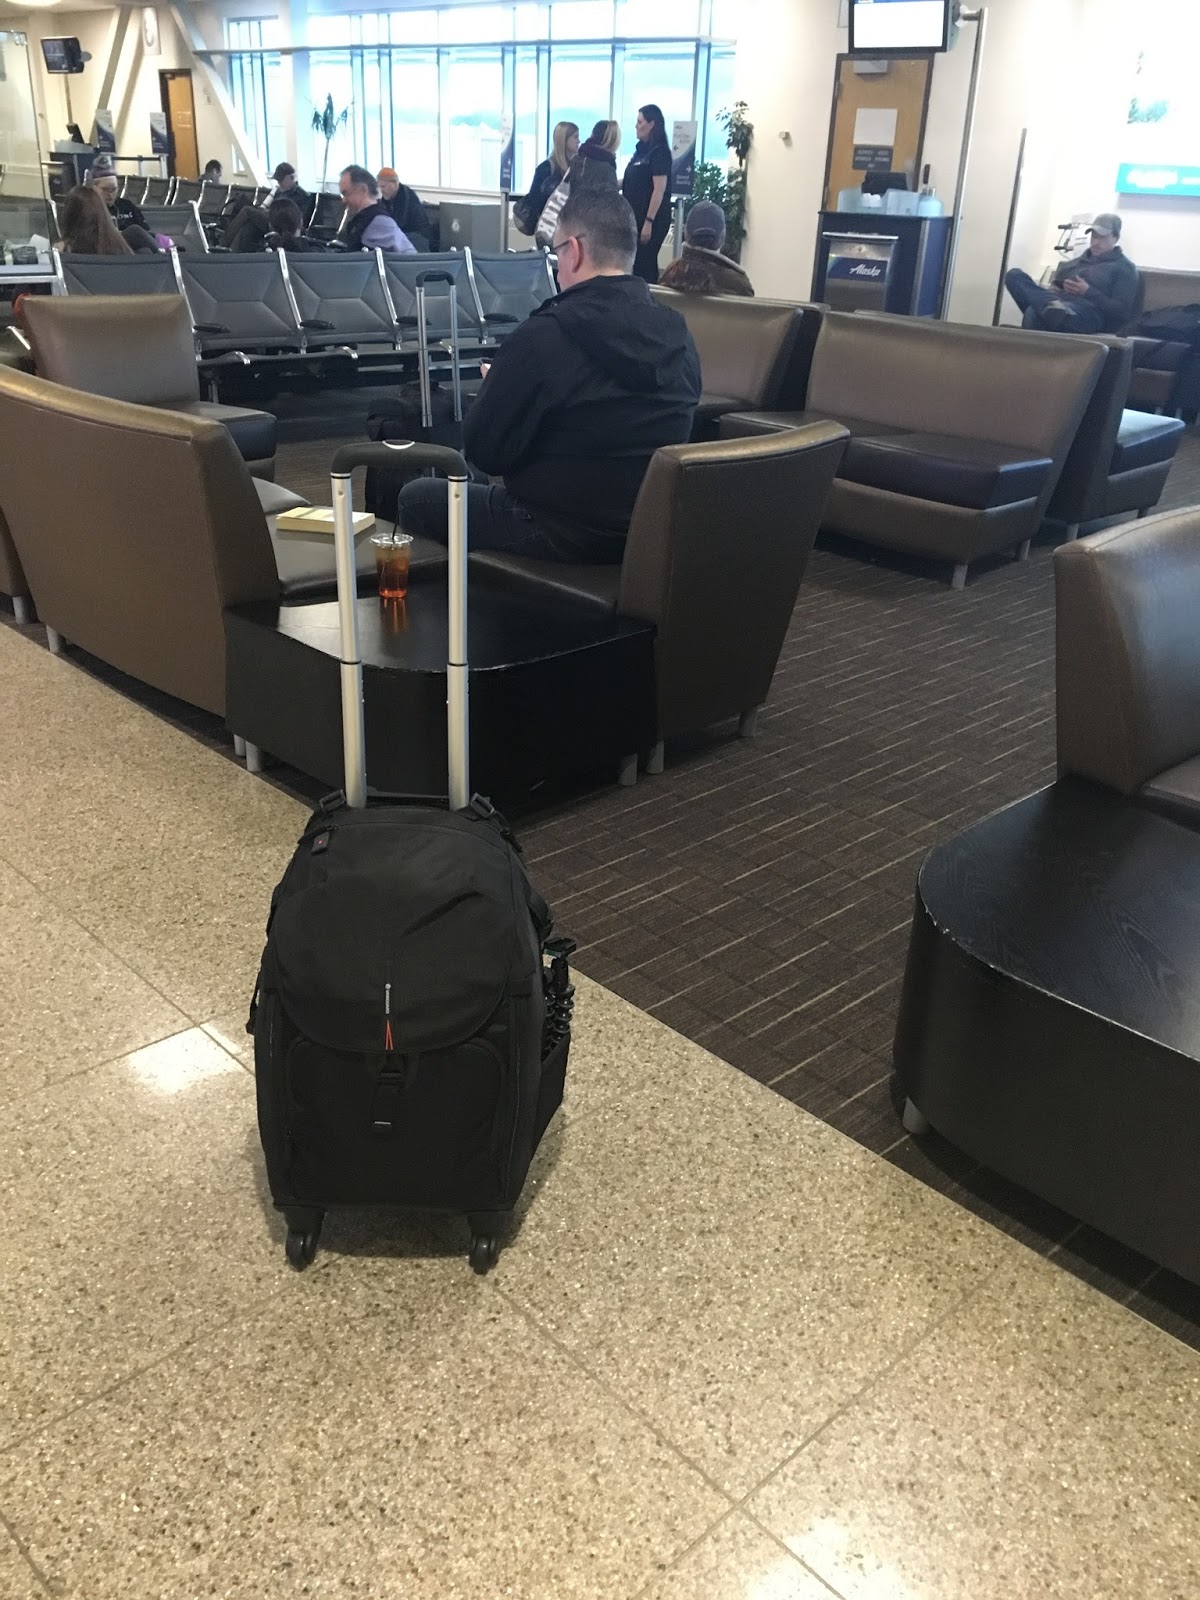
for a 'one subject' interview.   Below is my 'traveling kit'.  My previous blog entry covered
the rolling bag which holds my cinema camera body, a still camera body, lenses, batteries,
chargers, laptop, external hard drive, Tram 50 mic, SD cards, lens cleaner, iPad, iPhone,
lens converters, GoPro, headphones and a few other odds and ends.  My tripod is packed in
it's case.  The light is packed in it's provided bag.


Bonus, the provided bag is big enough that you can fit a couple extra filmmaking tools in it!....


Back to the light.  I bought a single panel, but you can buy multiple panel kits as well.
Make a big square.....or a long narrow strip.  You decide.  You can buy various frames
so that you can have a big square, a long strip, or whatever configuration you need.
I started by buying this one:
LED Go single panel

The light comes in a nice bag.  Open it up and you see this


After you pull out the light matte.....


It's a little confusing at first, but you will quickly get the hang of
putting all this stuff together.  Remember, you do not HAVE to
use the frame, you could just tape the light matt on the wall.
Or clip it to something with a clothes pin.....I mean C47.
The light will bend easily.  You can use this to 'mold' the
light as needed.


But if you want to, you can use the included frame and it
works pretty nicely.

One nice feature, is that the light has an included dimmer, and
color temperature fader.  You can literally use it matched to indoor
light, or outdoor light.  For example, say you are interviewing someone
and using outdoor light which comes through a window as the key.
But you need just a little more fill than the reflector gives you.
Boom, throw up this guy, dial the light to the appropriate color, and
fill in the opposite side.

Alternatively, you can use the light indoors as a soft key light
by changing the color temperature.


And with the dimmer, you don't need to worry about 'scrimming' down
the light, although it does come with a nice diffuser if you want to use that.
It's a handy little light, and I really like it.  You can plug it into the wall
with the included AC adapter.  Or you can use a V-mount battery with the
included V-mount plate.  Yet another option is to buy a third party V-mount
to Sony adapter and using Sony NP series batteries.  A ton of options!  Here is a
little review video.


It's 'light', controllable, cool, and has lots of options.  I'd highly recommend 
adding this light to your kit, if you are a solo filmmaker or video producer.


Gabe Strong
Cinematographer/Editor/Owner
G-Force Productions Digital Cinema


Monday, May 1, 2017

Travel gearbag

Like most people who work making promo films and TV spots, I will sometimes need
to travel to shoot something 'on location.'  If you are anything like me, you shudder at
the thought of your expensive camera gear being tossed into the belly of a jet by some
uncaring airline worker.  So normally, I try to carry on my camera body and lenses in
a camera bag.  Now the ideal camera bag would have lots of room inside.  You need
to pack a camera body or two, several lenses, filters, batteries, chargers, memory cards,
and a laptop.  And that's before even starting to think about audio, lighting, tripod, or slider.
Making sure you have enough gear when you are 'on location' but you are not turning
yourself into a pack mule, has been the subject of quite a few film and video discussions.
I have read several articles about this, and know I'm not the only one that sometimes
has a hard time balancing bringing everything I need, with making sure I can quickly
move around and not worry about having to make 5 trips just to get all my gear with
me......as a matter of fact, other bloggers have written about this conundrum.

Here I have a FS700 body, an A6000 body, 5 lenses, a shotgun mic, a Tram 50 lav mic,
headphones, extra batteries and chargers, 12 memory cards, MacBook Pro, AC adapter,
2TB external hard drive, a couple ND filters, a screw on adapter for each lens, adapting it
to 82mm so I can use the ND filters on any lens I have in the bag, a GoPro 4 Black with
Peau Productions modified lens, and a Jobypod tripod for the GoPro in the bag.  The bag
has slots for a laptop, a iPad, and an iPhone.  Which bag is it?  (Keep reading and I will
get to it....but first I'll tell you about my requirements.)
Loaded up

Ideally the bag would have wheels so you could roll it along when in the airport.


My carry on

But for me, many of my locations end up being in fairly remote Alaska locations.


Sunrise in Unalakleet

Bush plane flying in Alaska

Having wheels is great for airports like Seattle, Anchorage, Portland or the like, but when you are in Unalakleet, it will be more useful to be able to put the camera bag on your back like a backpack, because those wheels won't roll so well in snow or mud.
Backpack with iPhone holder on straps


So after a bunch of research, I found the bag shown in the pictures above.  It is
the Vanguard Heralder 51T rolling backpack.  B&H has it for sale here.

Pros

Holds plenty of gear.

Has 4 wheels so can roll in an airport or on pavement.

Has backpack straps so can be used as a pack.

Has a laptop slot, iPad slot, iPhone holder so you can
bring your edit bay and other devices with you.

Seems to be very well made

Cons

Can get heavy quick.  Partly because it holds a good amount, but also having
the heavy plastic base with wheels makes it heavier than it would be otherwise.

It will fit in overhead bin (at least on Alaska Airlines) but just barely.  If you load
it up (like I did) it is a tight fit.  I did find out on the way back, that if you take your
laptop out of the bag to edit while on the plane, it fits in quite a bit easier.

A bit spendy, but often you need to pay for good gear!

In my next post, I will talk about what other gear I packed on my last
'remote' shoot, as well as reviewing a flexible LED panel light.

Gabe Strong
Cinematographer/Editor/Owner
G-Force Productions Digital Cinema

Monday, April 17, 2017

Win filmmaking gear for free!

All you have to do is enter your email address (which almost certainly means
you will be hit with 'spam/marketing' emails from them) and you have a chance
to win some pretty cool gear.  Is it worth it?  Only you can decide.....
http://woobox.com/f8ugnj/iso7qi


Gabe Strong
Cinematographer/Editor/Owner
G-Force Productions Digital Cinema

Wednesday, April 12, 2017

Router Speed Control??

One of the most important things, when crafting an image,
is control of the lighting.  But when you aren't in a studio,
don't have money for a one Ton grip truck, and you have to
shoot on location, by yourself, what can you do?  One of
my best purchases (relative to money spent) has been a few
little items from Harbor Freight called 'router speed controllers.'
They look like this and cost about $20 each.


Now these allow you to plug any light into them, flip the switch to
'variable' (VAR) and then use the dial to vary the intensity of the light....
like a proper dimmer!  It's not perfect, as the color temperature of the light
will change as you use the makeshift 'dimmer'.  However you just dial
in the intensity of the light that you want to use, and only then do you perform
the white balance.  And you can plug any light up to a 1K into these....cheap
shop lights or whatever.  This really adds a new level of control, to say, an
interview setup.  Throw one of these on the key light, fill light, hair light, and
background light and tweak how they balance against each other....no scrim needed!

However, it gets even better.  I found a new use for this underrated piece of gear a
couple years ago.  I was hired to DP a 'Docudrama'.  The film was about 'first contact'
between Russian fur traders and Alaska Natives.  Some of the scenes were to be shot
in sod houses at the Alaska Native Heritage center, and many of them called for the
scenes to be shot by firelight.  One problem.  The Alaska Native Heritage center would
not allow us to actually light a fire.  So we needed to stage something where it would
be bright enough to see all the great costumes that our actors had.....but looked like
authentic firelight so as to fit the period.  The director was thinking about using a
reflector and having someone 'wiggle' it back and forth near a light.  Then suddenly
an idea came to me.  What I proposed, was taking a couple 1K lights and setting them
down into the fire pit (an area which is goes down into the floor and is about a foot and
a half lower than ground level.) . Then I suggested that we clamp on some orange
gels in front of the lights.....to give them the correct look of 'firelight.'  Finally, I
pulled out my 'dimmers' and hooked one to each light.  Then we tasked a crewmember
to sit at the controls of the dimmers, and 'flicker' the knob up and down in an erratic
way.....low budget simulated firelight.  It wasn't perfect but for a low budget indie
film, it was acceptable.  I cut together some random scenes so you could see how
it looked.  This is NOT an edited piece, I just grabbed some scenes and slapped them
together so you could see if this technique looked realistic enough to use when your
own films call for a fire lit scene.


Not bad for something known as a 'router speed control'....

Gabe Strong
Cinematographer/Editor/Owner
G-Force Productions Digital Cinema


Friday, July 15, 2016

The Big Fundamental

My 2009 Mac Pro has went through quite a rebirth.  New CPU, new GPU, internal Blu Ray burner, RAM upgrade, all four internal hard drive bays full, and now, for the final step, SSD drives.  With
all four hard drive bays full, I went with the Velocity Duo card which is actually a benefit as the SSD
drives perform much better on it then they would in the hard drive bays.  It's a pretty easy process.
Order the Velocity card and the SSD drives.....pictured below is what I went with:

First you just take out the SSD drive and line up the pins


and snap it into place on the card


And then you repeat the process for the second SSD


Now all that is left is to slide the Velocity card into an open PCI card slot....mine
went right next to the 980 Ti GPU.


Now for some benchmarks.  First I ran a disk 'speed test'.  Here is the results


Next for some real world tests.  First, I encoded a multicam dance performance
from AVCHD(FS700/100/VG20) to DVD using the default 'DVD' settings in
FCP X's 'Share' menu.  The timeline was about 1 hour and 22 minutes long.
And it took.....14 minutes to compress it to DVD!  But alas, I forgot to take
screenshots, and by the time I remembered, the project had already went out to
the client.  Yikes!  Luckily, I was just about to start another project.  This was
a multicamera play/performance.  It was 24 minutes long.  And it encoded from
AVCHD (FS700/100/VG20) to DVD using the same default 'DVD' settings
in FCP X's 'Share' menu in....5 minutes!  It literally is so fast that I click on
'Share' and by the time I can click the keyboard shortcut to take a screenshot
(Command/Shift/4) and take the screenshot.....the timeline is already 5% finished!


(See, in the above picture it is already 5% done in the time it took me to click 3 keys!)


(Started at 12:24 and finished with the encode at 12:29!)

So there you have it.  A 2009 Mac Pro, upgraded from a stock quad core 2.66Ghz model
to a six core 3.46Ghz,  a GPU upgraded to a 980Ti (6GB) GPU, and a couple SSD drives
which are on a PC card.  Not bad, not bad at all.  It's an older computer, but it can still
give the 'new kids' a run for their money.  As a basketball fan, I saw today that one of my
favorite players just announced his retirement.  Tim Duncan, who was still ballin and 
showing the young guys how it was done this past NBA season has hung it up.  I'll miss
watching him play.  He wasn't a showman and didn't talk a bunch of junk, he just went
out and performed like a 5 time NBA champ.  Truly an end of an era! And when this 
old Mac Pro finally retires I'll miss it too.  They really don't make them like this anymore.
I may just have to rename my edit computer 'The Big Fundamental'.

Gabe Strong
Cinematographer/Editor/Owner
G-Force Productions Digital Cinema


Friday, January 15, 2016

Changing reality....

Sometimes when you are shooting a video....things
just don't work out for you.  Craft services forgets
your prime rib.  The star actor steals your director's chair.
A moose knocks over the rented Red Epic that you leave
for 'just a second' mounted on the tripod, while you look for
the caterer and the star actor so you can give them a piece of
your mind.  Or, even more our of the realm of belief.......you
have a sunny day in SE Alaska!

So, in this case I was working on a promo video for an
afterschool program.  The script called for some shots, showing
depressed kids, looking out the windows of their house,
while rain ran down the window.  Creating a dreary mood.
How was I to know that when we FINALLY got permission
from the parents to shoot, that it would decide to be a beautiful
sunny day?  Juneau is in the middle of a rainforest, if there is anything
you can depend on,......it's rain!  Except for when you can't.
Not having the option to reschedule the shoot, I decided to
do what every good cinematographer would do.  Just shoot and
and tell them that they can 'fix it in post'.  Except in this case.....I was
doing post as well!  Oops...what was that stupid cinematographer thinking??
Anyways, after the shoot was done, here is what the shots looked like.


Sun...sun.....and more sun.  How did this happen!?


Not exactly the mood we were going for!  Now to start poking
around to find out what can be done in post.  First, a little color
correction.  And push everything a little towards the blue, so it
doesn't look so sunny.  Next, how to make some rain?  I edit
in Final Cut Pro, but there is a great little companion program to Final
Cut Pro called Motion.  And I found a nice filter in Motion called 'Water Pane'
which looked like it did just what I needed.  It would put water drops
on a simulated window.  This filter is in Final Cut Pro as well, but often, this
type of thing is easier to do in Motion (kind of the poor man's After Effects).
In Motion, you can draw masks in, motion track, and all sorts of things.  Anyways,
after I duplicated the filter so I could create my own tweaked version (you usually
don't want to just use these filters 'stock') I dropped it on the clips.  But something
wasn't quite right.


So in the above picture, it looks like the window is behind
him.  You can see that if you look at the water running in the
areas the red arrows are pointing towards, on his ear and shoulder.
Obviously, in this shot, we want it to look like we are inside, looking
over his shoulder, out of a window, and that is NOT what it looks like!


Next, in the above picture, it looks like you are looking out of a
window at the subject.  In this case, we want it to look like he is looking
out a window at us.  Again, note the water running in areas where it
wouldn't be running (as pointed out by the red arrows) if he was
looking out a window at us.  So now, we just need to mask off the
areas where we don't want water to appear.  In other words, we create
a 'mask' where the water is 'allowed' to appear.  Easy to do by drawing
a mask in Motion.


In these two pictures, the mask, is the area which is red.  This is
where the water is 'allowed' to show.


And suddenly everything works!


Just for comparison's sake, here is a little video showing 'before' and 'after'.


And that is just a quick little example of how a person can 
change the 'reality' of the shoot, in post.  If you would like to see
the entire video, it is here:


Gabe Strong
Cinematographer/Editor/Owner
G-Force Productions Digital Cinema


Monday, September 14, 2015

GPUpgrade

I now continue my attempt to keep my 2009 Mac Pro relevant. As outlined
in my previous blog, I have performed several upgrades on my 'cheese grater'
since I bought it.  Recently, I 'flashed' the firmware on it and upgraded my
CPU's from a single Quad Core (2.66ghz) to a Hex Core (3.46ghz).  It was
a big upgrade, especially for compressing and outputting video.  But for
rendering video in the timeline, it's not quite as much help....so next up,
I decided to upgrade the video card again, as many video programs
are starting to offload a lot of the work to the GPU card.  My
Mac Pro had the old GT120 (512MB) and a Quadro FX 4800 (1.8GB)
as the current graphics cards....so I started looking into options.

After a lot of research, I decided that the Nvidia GTX980 Ti would be a 
good candidate.  Now the GPU you decide on, can largely depend on
which programs you use.  Adobe and DaVinci Resolve, both make 
great use of the CUDA technologies on the Nvidia cards.  FCP X on the
other hand, uses Open GL/CL which is what the AMD cards are best at.
Now, I love Adobe's programs.  Premiere Pro, After Effects, Photoshop,
Audition and even a few new good ones like SpeedGrade and Prelude.
But what I cannot STAND is Adobe's new payment method.  No more
buying software.  If you wish to use Adobe's programs now, you must
pay them a 'subscription' fee, just as you might pay your cable company
or cell phone service provider.  You pay monthly, and once you stop paying,
the programs stop working.  So I refuse to use anything beyond Adobe's CS6
(which was the last version you could outright purchase from them.)  But
I do use DaVinci Resolve.  Which means CUDA is nice for Resolve, but 
Open GL/CL would be nice for FCP X.  It seems, that the Nvidia GTX980 Ti,
though, uses both technologies, and furthermore, it seems it's performance
benchmarks very well in both.  

Next I would like to give a shout out to MVC (Mac Video Cards).   These enterprising
computer experts, take video cards and 'flash' them with the Mac EFI.  Now with 
Yosemite, you don't 'have' to do this, if you don't need the Mac boot screen.  I 
actually have 2 different hard drives, and switch between which one I want to boot
from, by holding down option when I start up my computer....and without the boot 
screen, I wouldn't be able to do this.  I also like to support these guys, as they seem
to be trying to help keep the old Mac Pros viable, as long as possible.  So I bought
my GTX980 Ti from them.  Another option, which would be even better, would be
to buy an overclocked GTX980 Ti and then send it to them.  They will flash the
card for you for $180....and then you have the even faster GTX 980 Ti.  But even
the stock one is plenty powerful as you will see.

So I ordered up the card.  MVC got it to me pretty fast.

One thing that kept bothering me when I was doing my research, was that
if you just went and bought a 'unflashed' generic GTX 980 Ti, it said you 
needed a 6 pin power connector and an 8 pin power connector.  The 2009 
Mac Pro, only has two 6 pin power connectors.  But at MVC's site, it said 
the card came with two 6 pin power connectors.  Now I was pretty sure that
MVC didn't have any special version of the card, as I think they just buy them
and then flash them for you.  So, I just wasn't sure what to think.  But after 
I got it, the mystery was cleared up.  MVC sends you one normal 6 pin to 
6 pin cable, and one 8 pin to 6 pin cable,  along with the flashed card.  
There is no problem with anything,  it works perfect, you just need to plug in the 8 pin
end to the video card, and the six pin end, into the power supply in the Mac Pro.


And just slide the GPU card in like any other GPU card.  Now I will admit,
I misplaced my Mac Pro manual and it has been so long since I installed a GPU
in my computer, that I totally forgot how to do it!  Luckily, I had my handy 
iPad next to me and looked up an online PDF of the 2009 Mac Pro manual
and got the card installed.  Not too bad, but lets see how much it helped.

First up is a Cinebench benchmark

'Before' benchmarks 
Quadro FX4800 (1.8GB)


'After' benchmarks
GTX 980 Ti (6GB)

OK, so this card seems to have respectable OpenGL performance as well
as it's 2800+ CUDA cores....that's nice.  Next up is a benchmark in FCP X,
called 'BruceX'.  The following quote comes from FCP.co 

"BruceX is a small Final Cut Pro X XML file that you import into Final Cut Pro. It creates a very short timeline at the highest possible standard resolution that Final Cut can handle: 5120 by 2700 (at 23.975 fps). It uses standard Final Cut generators, titles and transitions. As it uses many layers of complex content, it requires lots of GPU RAM."

So, first, I tried it with my old Quadro FX4800.  It took 2 minutes and 18 seconds.
After I installed the GTX 980 Ti.  I tried it again.   Hmmm...strange.  This time it
took me 4 minutes and 45 seconds.  What????  Then I thought it over.  My problem
was that I had left my GT 120 video card in my Mac Pro.  It doesn't need either one
of the power leads, as it gets all it's power through the slot.  I have heard, that is the
best way for using Resolve, you plug your monitor into the GT120 and free the 
980 Ti from having to drive the monitor, thus letting it only have to perform the GPU
calculations.  But my monitor was plugged into the GT120, and FCP X was using
that instead of the 980 Ti!!!  So I switched the plug on the back of my computer and
tried it again.  And it took......25 seconds.  Wow, that was insanely fast.  So I then 
tried some plug ins that used to choke up my timeline.  NewBlue Titler 3D.  Not
even a hiccup, it just let me spin 3D objects to my hearts delight without even
stuttering.  3D text in Motion 5 was the same.  Now I'm sure that part of my 
astonishment, comes from the fact that I am jumping from an old, underpowered
card, to one of the better video cards currently on the market.  But this really
is a big deal, I can just do SO MUCH motion graphic stuff and 3D content in real
time!  Motion 5 benefits quite a bit here too.  Fair warning, Resolve 12
may benefit from having a 2nd video card in to run your monitor, but
FCP X does NOT seem to.  It seems that it only wants to use the card
that the monitor is plugged into.  At least, that is the way it behaved for
me when doing the 'BruceX' test.   

Finally, I tried Resolve 12.  My timing was perfect as the first 'official' 
(non beta) release had just come out, the very day I got my new video card.
I have heard all kinds of complaints about it being 'laggy' and not performing
well as an NLE.  And to be honest, with my old video card, I really couldn't
even use it, it was really slow and not even usable for editing.  I fired it up....and....
presto.  Not even the same program.  Realtime playback (23.98fps) when using
the edit page.  I could actually edit an entire video in Resolve with this type of
performance.

In summary, I'd highly recommend this card, especially if you are using
a 2009-2012 old Mac Pro.  It will give your computer new life.  Now 
there is another card the Titan X (12GB) which is even better.  It is significantly
more money though, and the 980Ti benchmarks very closely to the Titan X
in most tests I have seen.  As usual, it all depends on your budget.

Gabe Strong
Cinematographer/Editor/Owner
G-Force Productions Digital Cinema